Will it fit the Impala SS?
![]()
Will it fit the Impala SS?

Click it to see a larger version!

An early mock up just to see that everything's like I wanted it and
that everything's included in the kit. Click it to see a close up!

Centerline
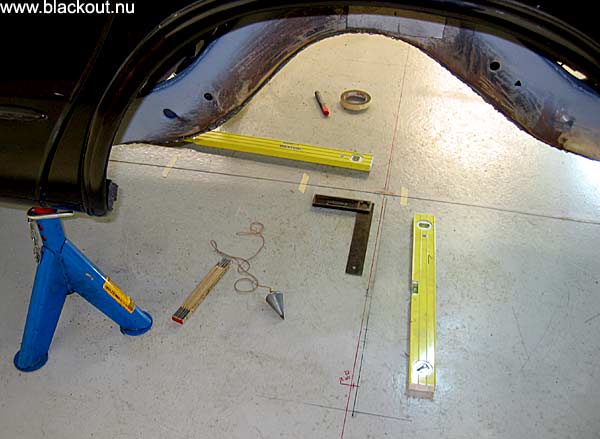
Rear end line. Oops, it has
not been lined up before!

Pre-made dummy was exact.
Lucky me!

Making space for 4-link control
arms.

Viagra.
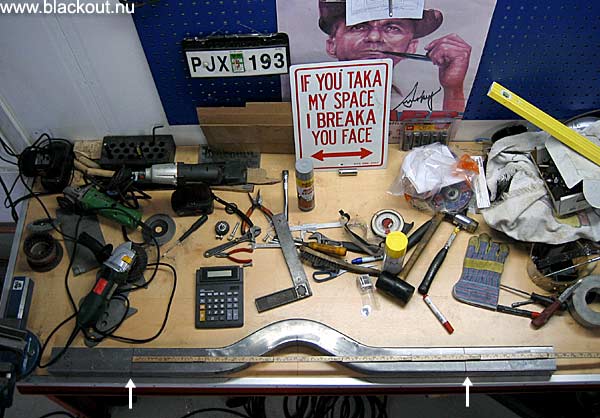
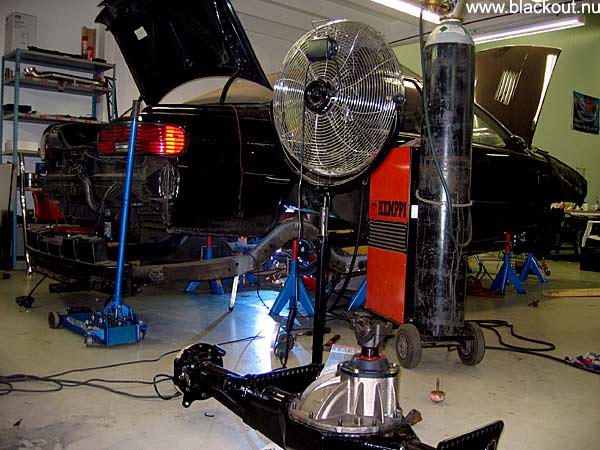
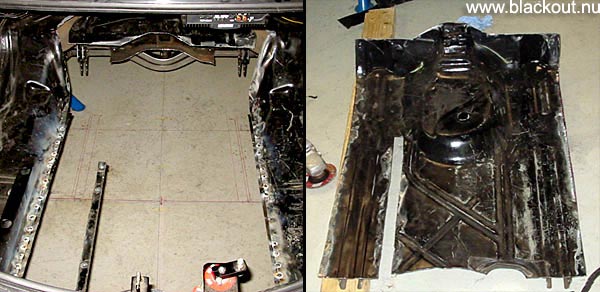
The crossmember needs to be shortened to the right width. It's great to have
the new work bench alive!

Three things must be right before tack welding the crossmember to the
Impala SS frame: absolute level, absolute tilt and exact placement.
Looks easy, takes hours. You suddenly think that you want to do
other things in your life. Coffee brake (fika). Floor lines guide you.

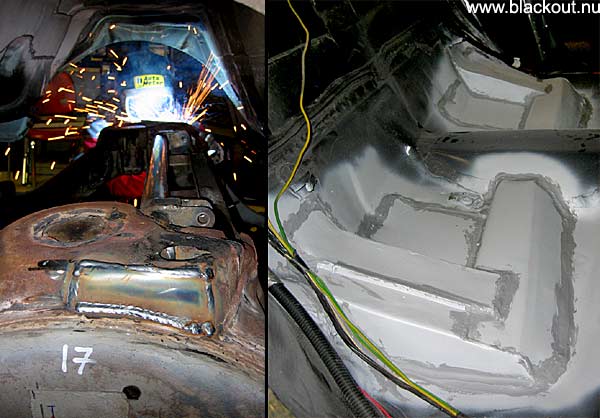
Sorry about my tack welding...hehehe. All my energy went to place those f*****g
bracket-bastards in line
and in level and the right angle. I had a new record in sweating under my mistress!
I'm not worried about
the final TIG- welding, I'm asking the best one - Tommy Aga - my garage neighbor
3 meters away!

Last chance to see if everything's within plan. Yes, I can move the rearend
3/8" (10 mm) forward to have
a slightly better location for the new wider slicks. The rearend will also be
3/4" (20 mm) narrower.
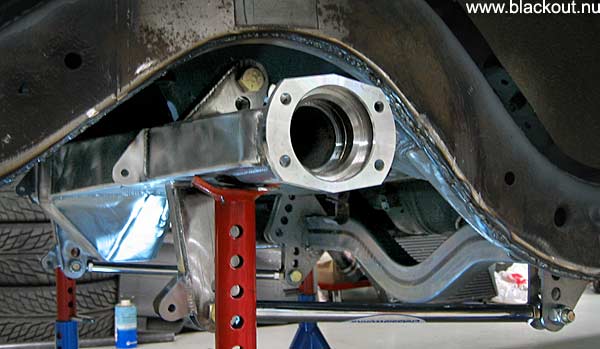
Mmmm. A very good feeling to see it all under the car!

As said before, if this 4-link had meant that the rear seat would've been destroyed
I would've chosen a
ladder bar solution without any hesitation. This is Good News for every SS-owner
in the world who wants
to step up to an adjustable 4-link. There's really room for it! You can certainly
live with the "Ouch!" from
the grinning back seat passengers. By definition - all passengers should be
grinning anyways.
The squared lines on the garage floor are still the things that rule.
If your hardware is not in line by the millimeter - redo it!
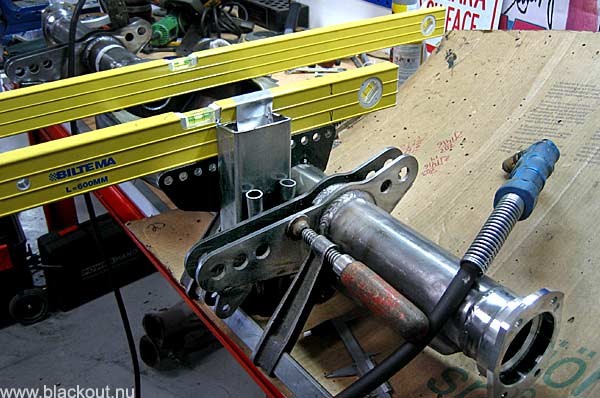
Placing the lower shock brackets on the housing. Hey, what do you do when you're
alone in the garage
and you need to finish it? Jig it up with whatever and tack it up! I followed
the Alston Chassisworks'
suggested distance between 4-link brackets and shock brackets - 4 1/8"
- but in the front of rear end.
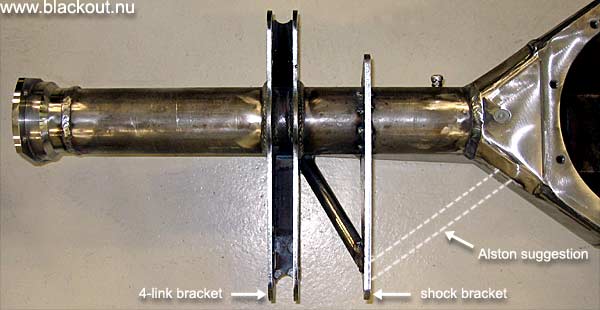
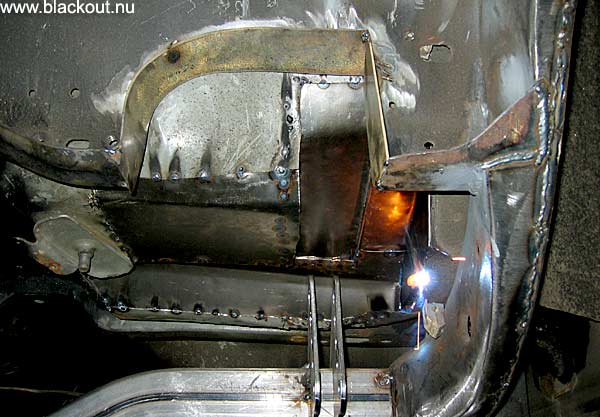
Chris Alston Chassisworks wants those tubular supports for the shockmounts welded
to the big housing
but since the Blackout SS needs to have its exhaust pipes passing exactly there
I welded the supports
to the 4-link brackets instead and everyone lived happily ever after.

Wilwood billet rotors rear disc kit. With parking brakes so it get street legal.
The Panhard kit to keep the rear end in the middle of the car. This is not needed
with the original set up
where the control arms are set in angles, compared to the straight control arms
in this new set up.
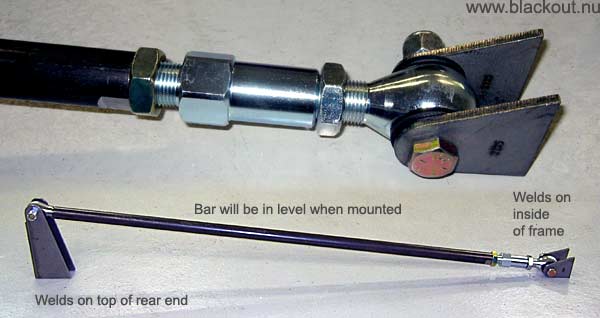
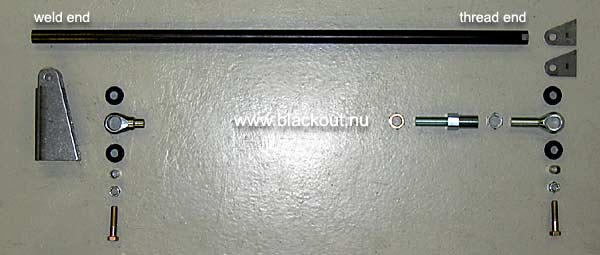
Alston Chassisworks has a smart adjusting layout. Both left and right threads
allow you to fine adjust
while it is bolted to the car. Bar should be as long as possible, mine is 105
cm for a space 106 cm
wide but I can of course adjust it a little narrower.

I cut away more floor because I want the new floor boxes to clear the power
wrench even when working
on the top adjusting bolt hole on the 4-link brackets. (Power wrench clears
the drive shaft, yes yes).

Time for the shock brackets bar. Fits just nicely.
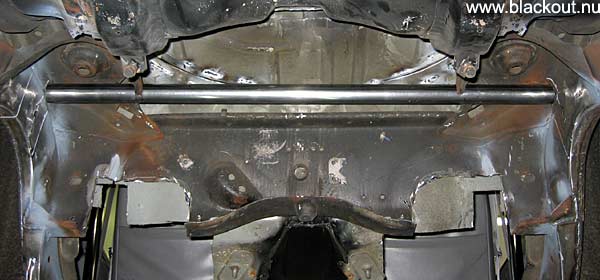
This 3 mm thick bar will definitely strengthen the frame.
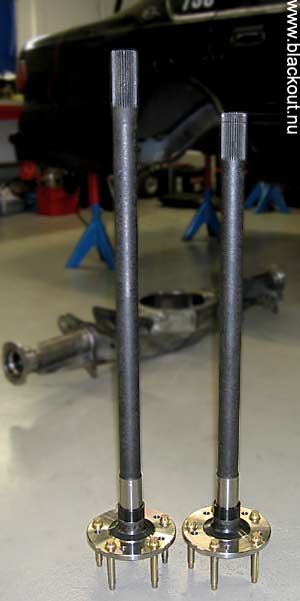 |
Strange Street & Strip axles. 35 splines
|

I ordered the axles with
two bolt circles - 5 X 5 and 5 X 4.75

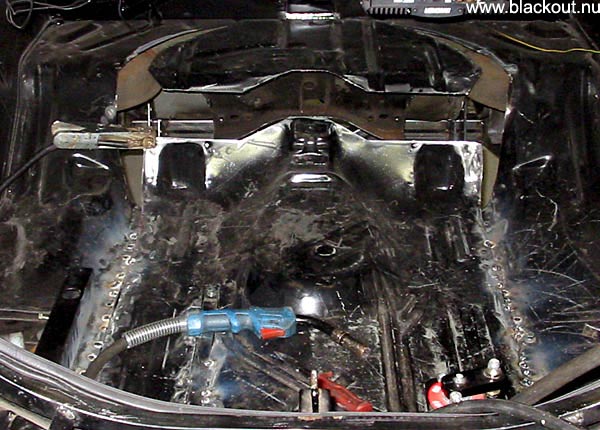
Tony is puzzling together the new floor underneath the backseat. But what did
mother always say about
gloves and face shields?
This is the passenger side coming together.
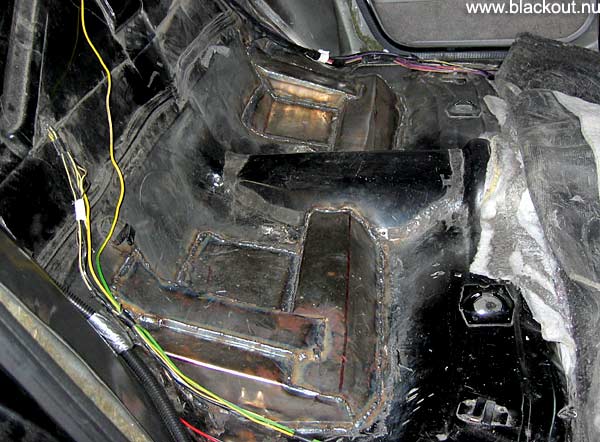
Floor is welded and awaiting some grinding and painting. Tony is very handy!

What can you say? The Master is back!

Every idea, every measure, every tack weld - now it's Final! And just Wonderful!


Zink.

Hehehee hoo ho ho. Just placing it to see if all is OK before mounting the shock
absorbers.

Hahahaaaaa ha haaaaaaaaa hi hihi.
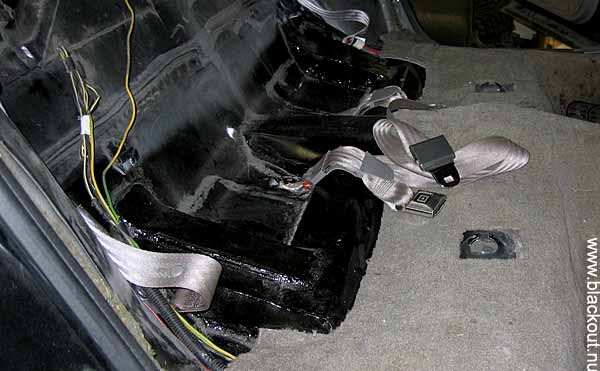
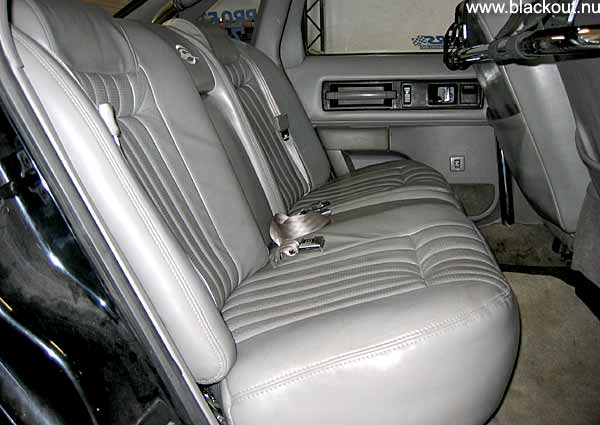
Well, it looks like it will work after all. Still must mod underneath the back
seat itself to make it
happen. Safety belts back in their original positions. Mat cut after new floor
profile.
Soon it will be a raggarbil again...
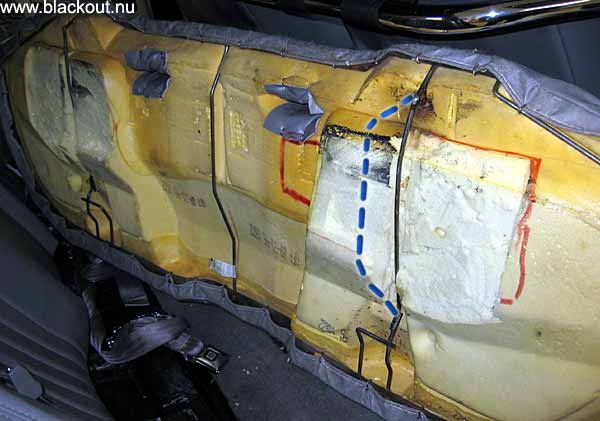
The
mods underneath the seat were not too bad. One inch of chopping of the foam
stopping with
a slö Mora knife. The original steel layout (blue) had to be straightened
out like Tony did here.
But do not make it dead on straight since it needs to get bent when mounting
it!
Ready for some serious ragging and rock'n'roll again! Jää-äz!
Look how Tony did the trunk makeover! Moved the "whole" trunk floor
backwards 3 inches.
You who own a B.-body can see very clearly how Tony bent up the sheet metal
to make more space for
the new rear end.
Tony is almost done with the mod. He moved a much larger part of the trunk floor
than I expected.
You just let Tony go with his things...

Look at the picture of original placement of original tank. This is now moved
3 inches backwards.
With no problems, except it was much work that needed the skill of Tony Döbrösi.
A little tighter in the rear with race fuel pump, fuel lines and original tank
rubber lines. And a little more
space in front in the behind of rear end - which was the meaning of it all.
All lines from the original tank
now have the needed space. A must-do when going for a fat rear end like the
Chassisworks Fab9.

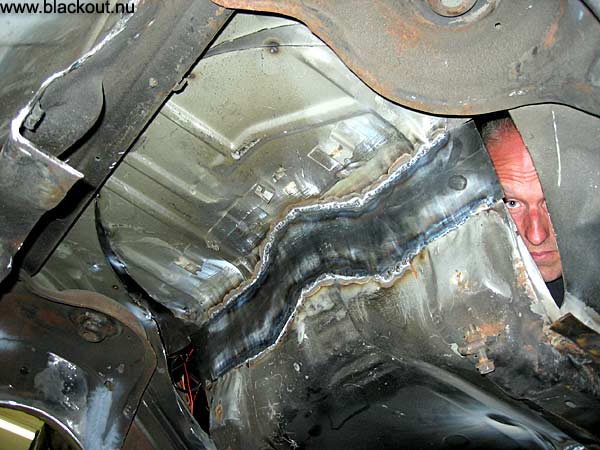
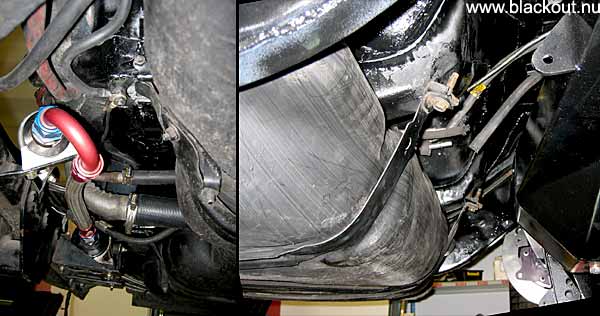
Ronny Oredsson's stainless brakelines don't touch the rear end housing except
in the upper wheeliebar
bracket where it hooks up to the stainless brake lines made by Rasmus Ravnsborg.
This installation
is made by Håkan.
More, as it happens...
Back
to FAB9 menu