
REWORKING THE HEADERS

Please click
bars below to get the whole picture:
Problem begins...

...and continues...

...all season!

August 20
The heat is on

Last try with these headers in this shape. It was hot at the upstart OK but
no fire! My guess is that
Jeezus also wants more fuel now when the new larger headers works so well? And
with more fuel
the temperature will go down. These headers are also thinner compared to my
last headers,
approx 1 mm to 3 mm. That also explain the increase of heat.
Not even this set-up could handle the heat of the 3 hour ride to Moholmen and
our last race of 2009...
But Axel and all his friends in the neighbourhood rushed to the garage when
I started it, and they had
their hands over their ears and jumped up and down shouting "REV IT! REV
IT!"
and I couldn't let them down, I've been 11 years myself. =)

So what to do to solve the problem?
- Reworking the
headers
Getting more air between the spark plugs and the tubes.
Driver's side
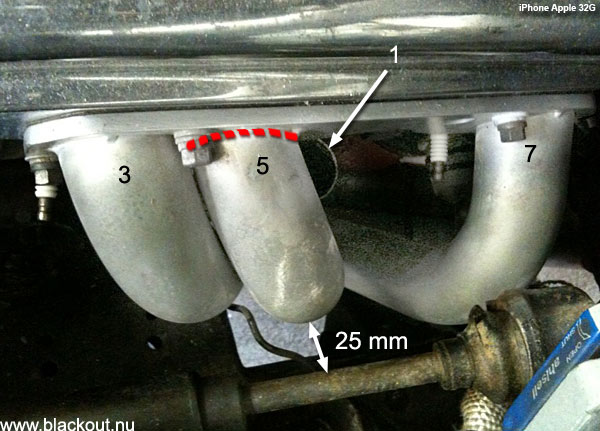
No 5 tube is largest problem. It's tightest to the spark plug boot and wire
which burns up in a minute.
Silicone or ceramic. Not shown here is the No 1 tube which also blocks the boot
into the oven, and
makes the life tough also for No 7 spark plug boot. Since it's some space to
the steering I will cut it at
the flange and add a 20 mm piece of tube to move it out. No 1 will also be moved
out as much as
possible. Jan-Åke Norberg designed and made these headers with Kent's
SS as a template and Kent
haven't had these problems because he has his spark plug wires traditionally
underneath. And I don't
want that because of my eight coils on top of the engine - and Smokey Yunick
has taught us to
have as short spark plug wires as possible...so it's a law! =)
Cameras
out - iPhone in!

All my small pockets cameras are now broken. So what a good
timing it was when we got our new iPhones at work Vingaland Film!
I used the iPhone camera to take the above pictures. It isn't as
good camera as the real ones, but the picture here on the ceramic
spark plug boot couldn't be taken with any of the small cameras.
The slim iPhone takes you there. And as you see you can't squeeze
a finger in between the boot and tube, that's too tight. And add to that
the No 1 tube coming down here to totally block off poor No 5 spark
plug. The ceramic can stand the heat but not the silicone INSIDE.
More tube

Kent sent some left over tubes from the building these headers. It'll
be enough for me to do the changes I've talked about earlier. I'll just
insert small rings here and there to hopefully make life much better
for the spark plug boots.

Tube No 5 will be 20 mm longer at the header flange. I'll bring it to
Jonas Alholt later to have them TIG-welded. It's nice to have the
garage at home becuause you can do little now and then without
any great effort. Cheers too!
Mock up test

I thought it might be a good idea to test mount the headers with the
extended No 5 tube taped in its place - before having it welded. And
it fitted right in and it was still about 10 mm - 3/8" gap to
the steering shaft. Goodie.
No 1 tube next

The new No 5 tube which is 20 mm longer with the inserted piece.
As you can see it makes it possible to also place No 1 tube further
out from the head and the spark plugs. A bigger change than this
picture shows. That will be the next step.
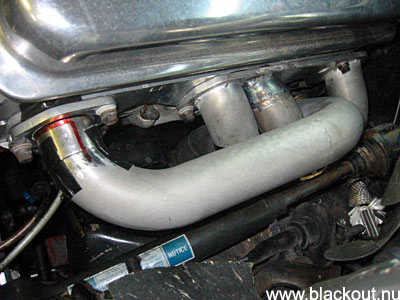
To move the No 1 tube out from the head a little more than an inch
also means more space around it where it goes downwards there
in the back between tubes 5 and 7 where the overheating problem
has been worst. This tube has to be tack welded in its position.

It was nice to be back with Jonas Alholt in his garage and asking him
to begin welding my small headers re-design project. And Jonas was
like always when he warmed up both the TIG and himself - and
shouted out loud : "I hate this hassle!" And when it after all turned
out to be a very good weld he said with a smile: "Yes, this is OK"
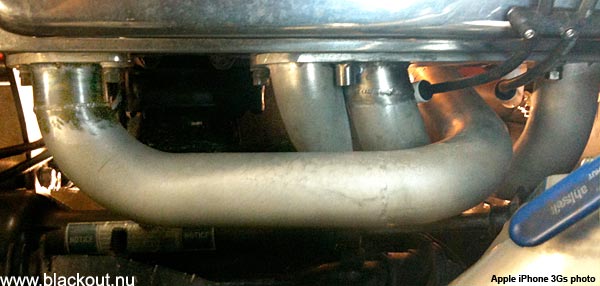
Final look at the Drivers' side. Much better. If this doesn't work I have to
place the spark plug cables
underneath. Hope not.
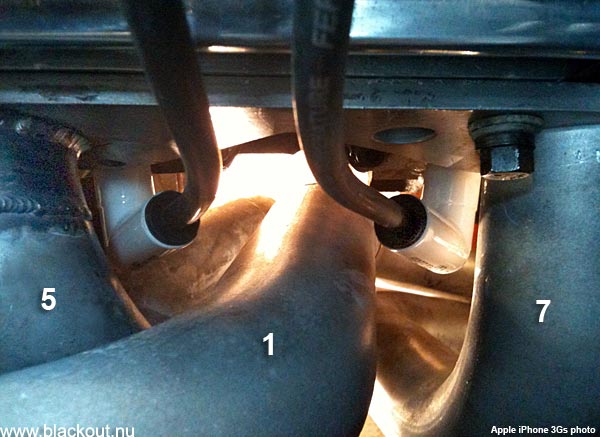
More air should do it.

Before: In the end I tried to protect them with all materials I had!
The old heat sleeves AND double layers of Silica! The silicone boots
and cables were still melting before home - not burning but smoking.
Two cylinders out, # 5 and 7.

Before and after comparison.

Jonas do the final welding on the driver's side header. Now that side
is done. Even if I don't report it all, I'm working now and then in my
garage with the headers and then take it to Jonas to have it TIG-
welded. In January I will start with the passenger side. Then both
headers will again be thermo coated.
After that we're ready for our tenth season with the Blackout SS!
Another stupid problem!

At the local Blackrace (No 2 bar at the top, Test'n'tune) it said POFF!
...and these floods of escaping VP Synthetic 10W-40 racing oil
stopped any further testing!!! OK, so what's next?

It was the front crank seal that had losened and poffed out! Note oil
drops everywhere. It was just to unmount the blower belt and make
the car ready to drive home...#@&=($£!

At least the seal came off in one piece, so I cleaned up the mess
and glued it back in it place.

The source of the problem must be the new thing of the year, the
PCV
valve. It has to go. It works well on a NA engine but not on a
blown!? And it's really made for open headers use, not a full exhaust
system. I had connected the crank case ventilation hoses from the
valve cover and the one from the front of the engine to one hose,
and back here. Possibly too tight for the air. My bad.

The PCV valve was plugged and I took use of two small stainless
bottles from Biltema (40 SEK each), drilled them and once again had
a working crankcase ventilation with the tubes from the valve cover
and cam cover. I have always had it this way but threw away (!) my
former bottles when getting these new headers with the PCV valve.
Free the air!
Passenger side
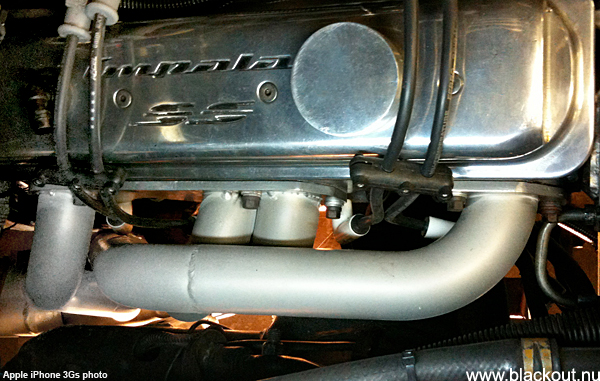
Slightly different design compared to the driver's side, so the problem is a
bit different too.
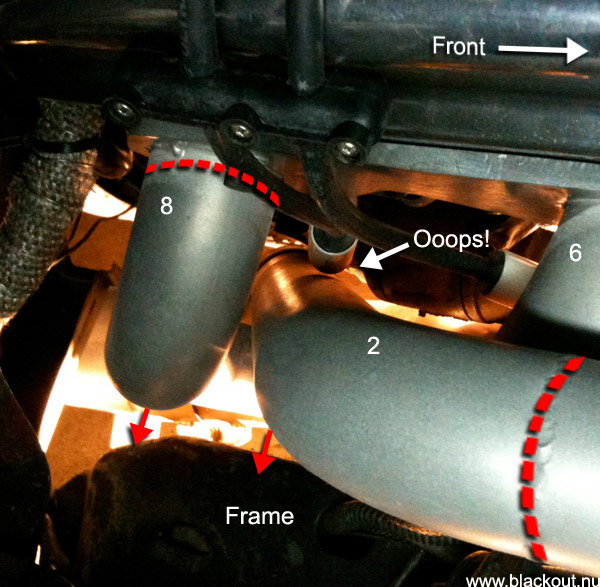
# 8 spark plug boot is too close to # 2 tube, even if it hasn't been to any
problem yet with the ceramic
boots, but it will...? My guess is that air is cooling better on this side?
Anyway, I have an inch of space between the frame and the # 8 tube so I'll cut
the tube and move it
away from engine and closer to the frame. That will give me a chance to re-organize
and move also
the # 2 tube away from the engine and that spark plug boot. # 2 tube is now
"stopped" by # 8.
February 14
Looking good
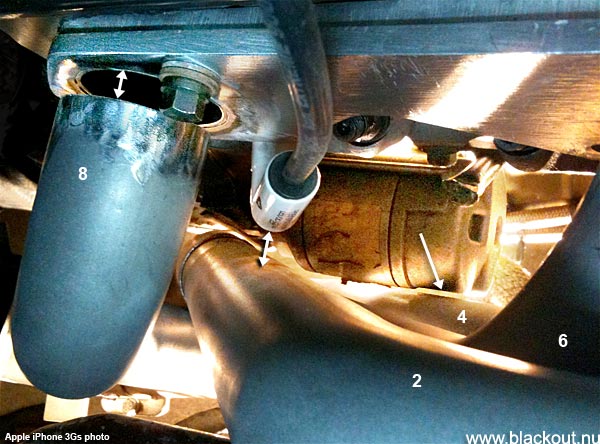
I knew it. At least I hoped for it. By adding only a 3/8" ring to the #
8 tube will transfer to a larger
movement for the # 2 tube giving a clearance of at least 5/8" to the #
8 spark plug, and open up at bit
between the tube and the starter motor. Things which makes me happy. While at
it I might as well move
also the # 4 tube away from the starter motor. So # 6 tube is the only one that
not will be altered.
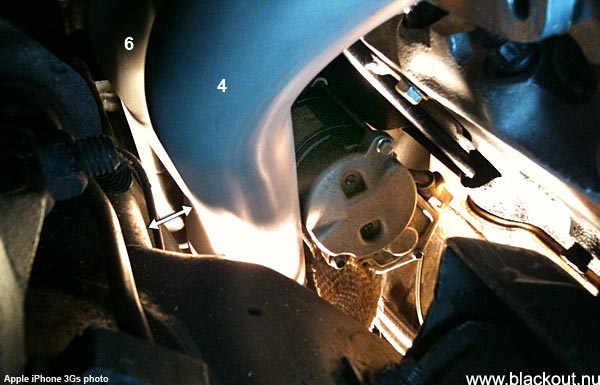
Also here are good space between the tube and the frame so I can give at least
a 3/8" clearance to
the starter motor, without making the headers manifold too difficult to move
in and out.
February 27
Therapy time again
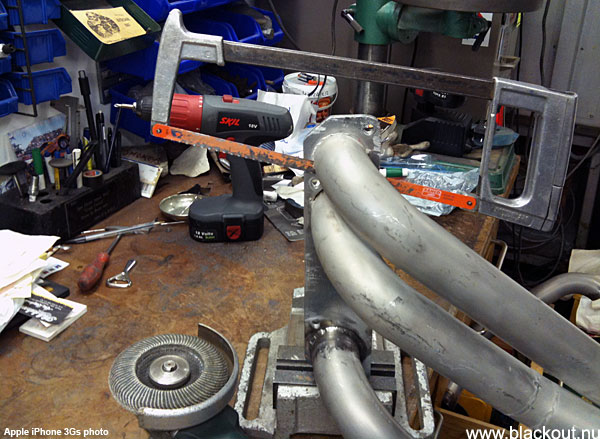
Breaking loose from work to do something else - to save the brain. I continued
the rework
of the headers, passenger side tubes.
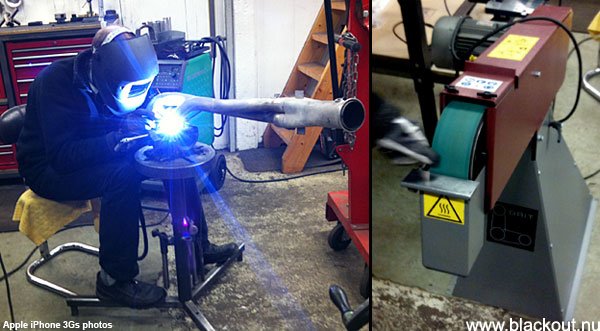
It was nice to take a drive to meet Jonas again in his Höjdargaraget (Top
Notch Garage). I go to him
for each tube to have him to TIG- weld them. One at the time, so I don't loose
the fit of the unit.
He proudly showed me his latest investment - The Grinder from Hell! A big monstrous
thing!
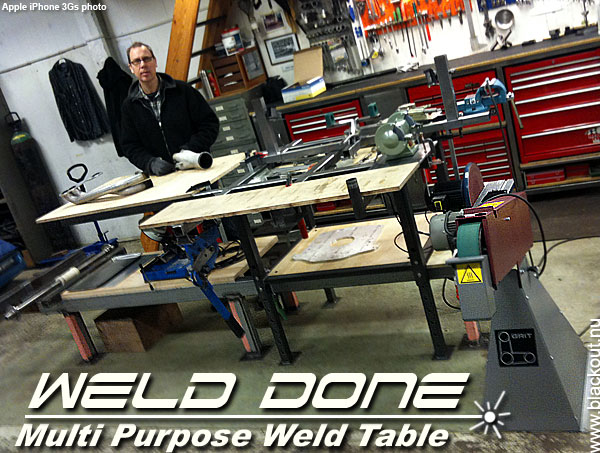
Jonas proudly showed his latest project, his old dream of a multi purpose weld
table is now a reality.
Tailormade by himself of course. The table is also a chassies jig and it has
numerous of features. All
machines, tools and things are swiveling and interchangeable within different
positions on the table.
They can quickly be mounted upside down or sideways... My guess is that Jonas
has given this at
least as many hours of planning as it took to build it.
And it has a good hang factor when visiting.
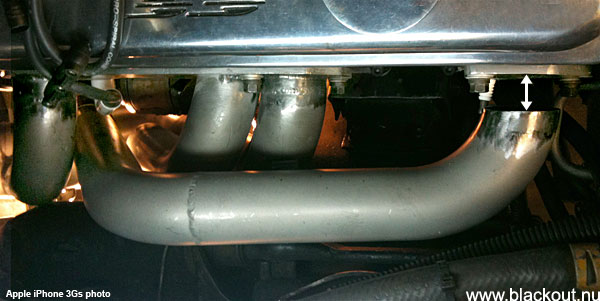
Back in my own garage it's nice to mount the headers to see the improvements!
Now it's only
the separate # 2 tube that will be prolonged by an inch. Then it's ready to
race again!
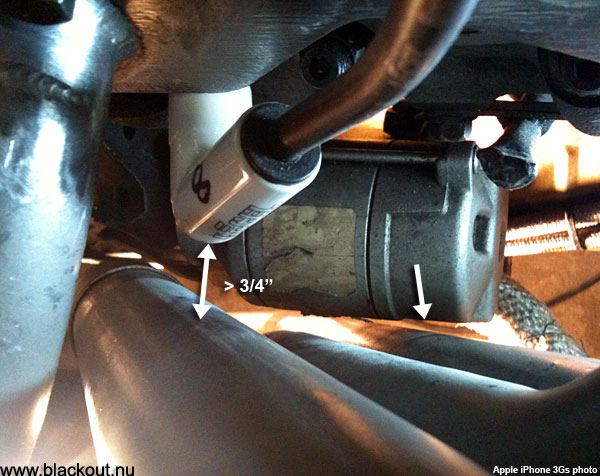
Improvements. The gap between # 8 spark plug boot and the # 2 tube has gone
from zero to at least 3/4"
and the gap beween the starter motor and # 4 tube has been doubled. Wonderful!
And - my brain is rebooted and fresh again, ready to take on daily work with
full power.
April 10
Headers completely Weld Done!
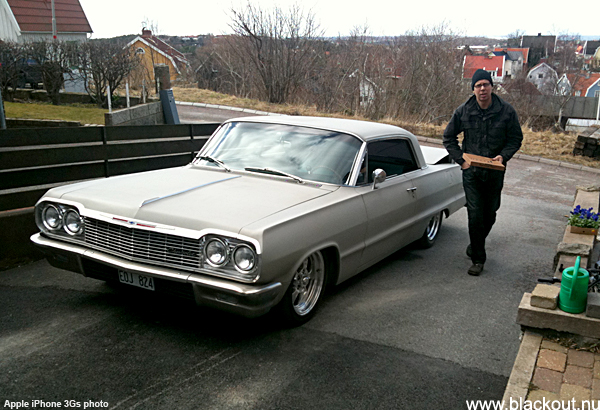
Today Jonas showed up in '64 style and proved the winter is over! And he brought
a pizza, one (1) pizza!
And last time I counted we were two (2) of us in the garage. He offered a slice
but I was satisfied
with the things he had in his trunk - a mobile TIG welding kit...
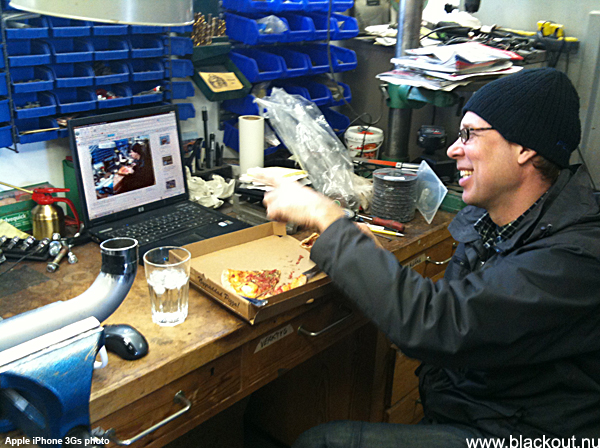
Always fun to flaunt the iPhone-Facebook magic for Jonas. This time he suddenly
saw himself
eating pizza on Facebook... Fun fun fun.
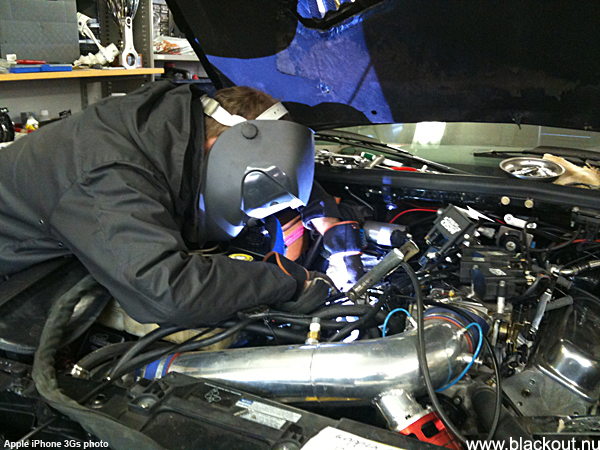
The reason for him to drag the welding equipment to my garage was that the #
2 tube had to be tack-
welded in place, or else it was a risk that it wouldn't fit in it's place. The
same thing with # 1 tube.
It's because these tubes are the ones that can be taken off separarely and are
not welded to the
header flanges with the rest.
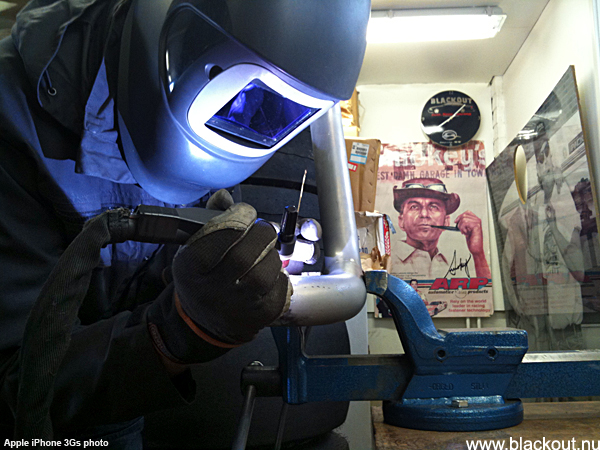
The finishing welds were done in the vice. And Smokey Yunick
overviewed that Mr Al Holt kept his high standard.
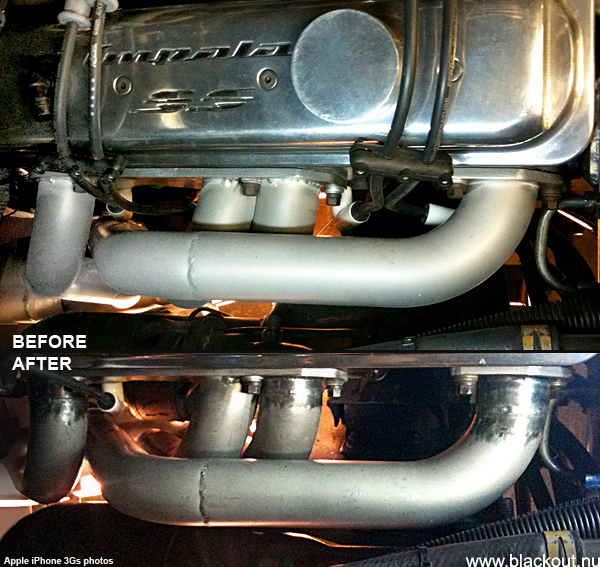
That's it! The reworked headers are finished! I'm waiting for the headers wrap
from Birgitta at Autoshop.
That will also help in keeping the temperature down around the spark plugs and
cables.
Thank you very much Jonas! Weld Done again!
It's a wrap!
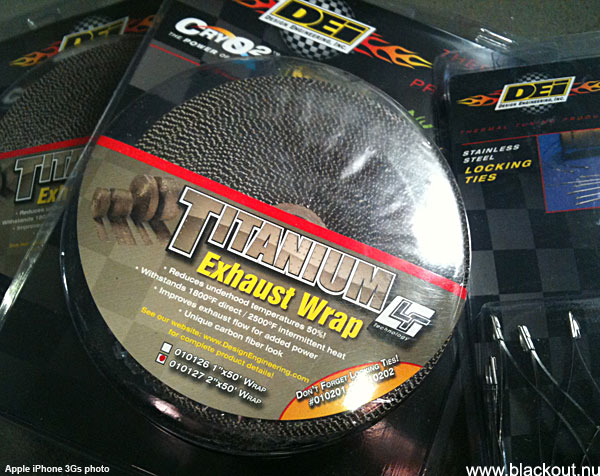
Lava is everywhere! The headers wrap and accessories has arrived from Birgitta
at Autoshop.
It came just in time before the ash cloud blocked all air traffic in Europe!
It's only named Titanium but the real material is far more impressive I think!
It's actually made of Lava
rock! From Iceland? It's pulverized lava rock which is stranded into a fiber
material and is engineered to
be stronger than typical wraps on the market today - according to DEI's info.
It's said to handle 1800°
Farenheit directly and 2500°F radiant heat - (980 / 1370° C).
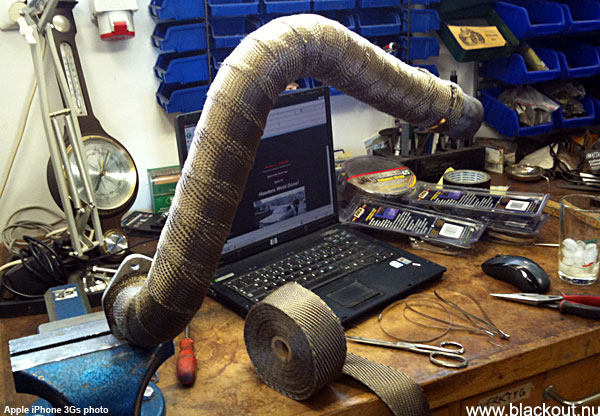
It was a wonderful day with the Blackout web site music playing and sun shining.
It was a first time
for me with the exhaust wrap and it's just like with all other first time mods,
just think and go along.
When you are finished you are the expert!
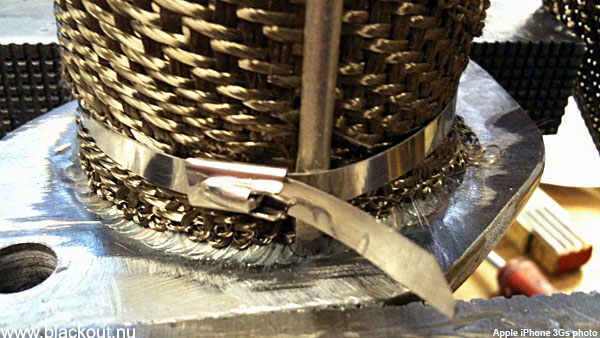
Only issue for me was the fastening solution, a stainless strap which was impossible
to really tighten
to the bottom, tighten to the bottom, but that's the way it should be according
to the manufacturer.
Well let's see what happens after a vibrating season?
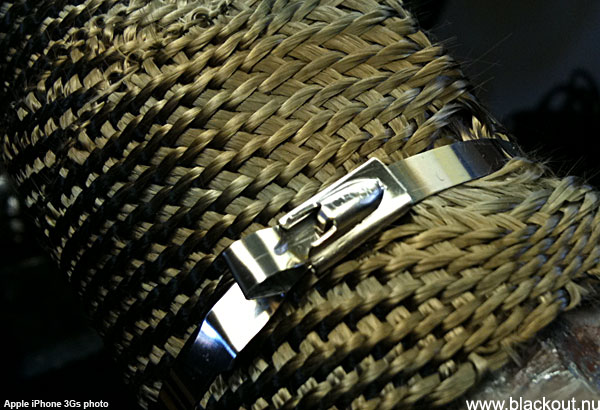
However, this wowen material was a treat to apply! It was no sales bullshit!
It felt like it really stuck to
the tubes and become a tight fit! Wonderful construction so far!
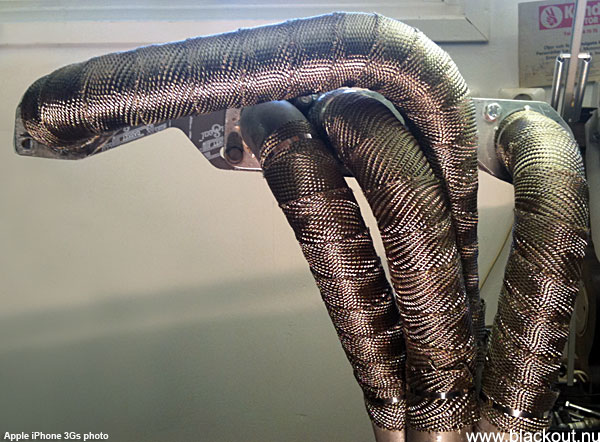
How beautiful it is! It should withstand 1800° Farenheit directly and 2500°F
radiant heat - (980 / 1370° C).
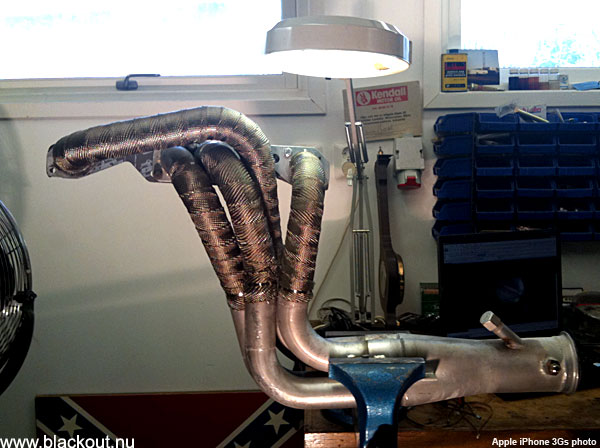
Just another nice picture, isn't it?
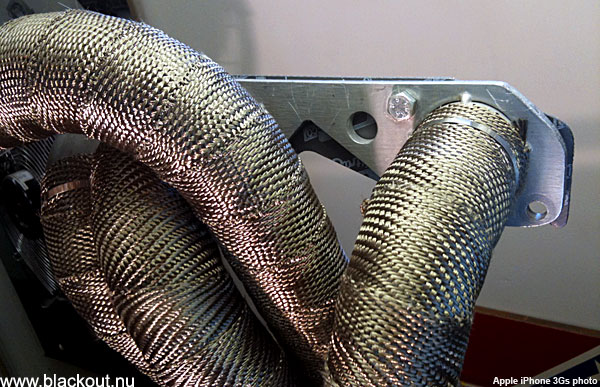
The overlap should be like 1/8" and that felt OK. And it looks good too,
doesn't it?
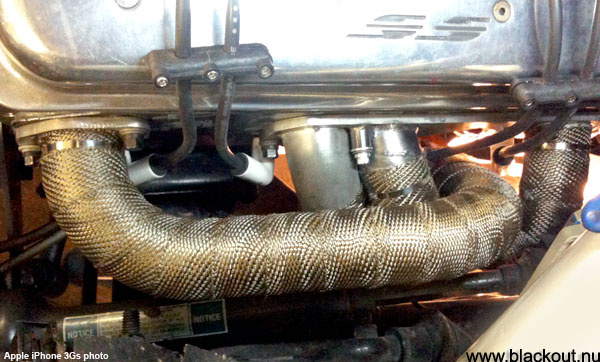
Oh, it's so nice for me to see this picture, knowing that this side is done,
ready for start up. The tight
clearence between the middle tubes # 3 and 5 made it impossible to wrap them
all the way from
the flange. I didn't want the hazzle of wrapping them both together and hide
the middle flange bolt.
It would look great on picture but I would curse everytime I tried to take off
the headers. And remember
the reason of this whole project - to lower the temp for the spark plug boots
# 5 and 7. It is done I hope.
Now it's just wait and see how many minutes it takes before it burst into flames
anyway? =)
May 2
Last work done!
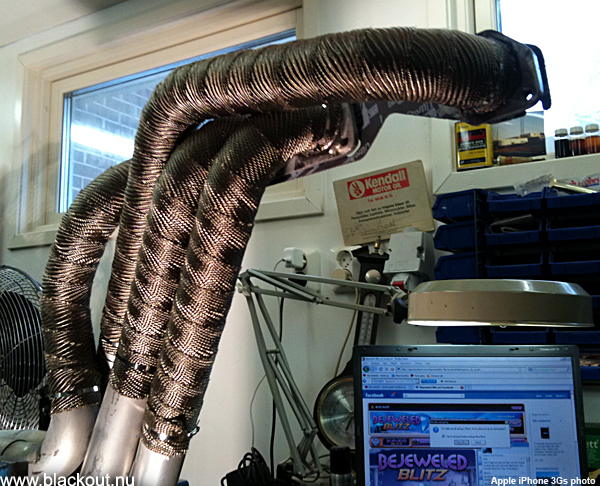
It's soon time to start it up again. Last mod is done. Wrapping is now easily
executed and it feels
like I haven't done anything else in my whole life. Could almost whistle while
doing it.

The warm sun convinced us to take a coffee break. This stuff is
important for us. But it was too hot after a while. Nice.

I think only two of the eight indestructible ceramic spark plug boots
were destructed last year, so from a whole new kit from Birgitta at
Autoshop I'm began to make two new spark plug boots/wires.
And since you can't buy them in smaller quantities I now have
100 straight terminals and 100 90 degree termninals...
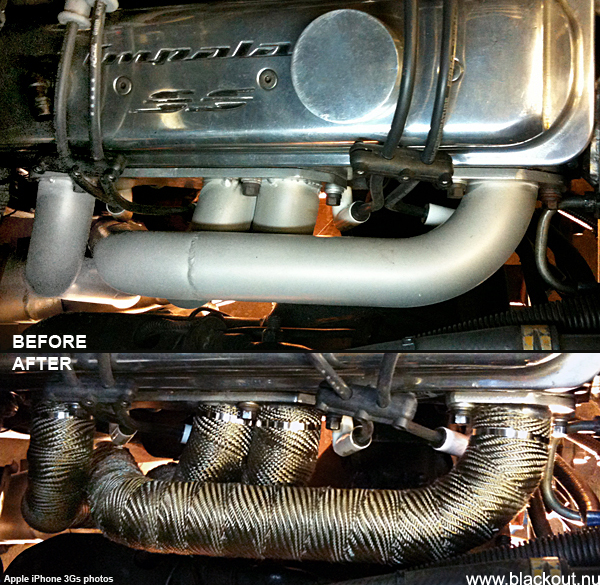
I hope the difference between last year and today will be enough for the survival
of the spark
plug boots and spark plug wires! It looks like it, but...?
So far so good, but then... (click bar below!)


Another unbelievable - but typical - Blackout feature! Because, have you ever
before heard about a
header tube which twisted in two places and came off in the sleeve? So suddenly
I had ONE open tube
under the hood, and it really sounded loud and trashy! Reasons: too hot (glowing)
tubes, full exhaust
system with mufflers building enough back pressure to actually bend the tube!
Freakin' thing to happen!
And I just hate when more than one thing happens at the same time! Now I got
overheating, belt
breakage, bent/opened header tube in one run! And still the battery is not charging
as it should be...
Jonas took the tube and gave it some good poundings so it barely could connect
with the rest of the
exhaust system again, so I could drive it home carefully.

One of the more remarkable things I have experienced! Now just change that tube
bend. To make all
these changes I borrowed a MIG weld to my garage from Michael Hernwall so I
could tack weld the
joints and then bring the tube to his welding company Elitmontage for TIG finializing.
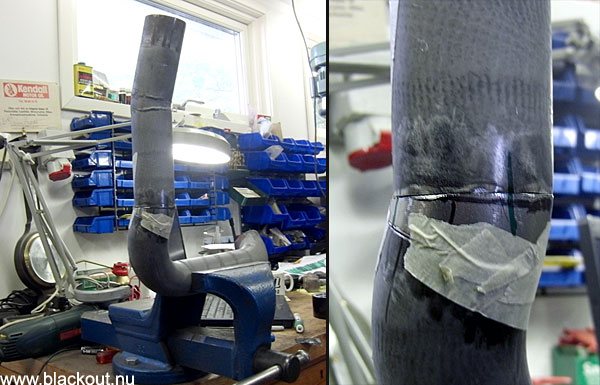
While at it I thought it was a good idea to also open up even more around the
spark plug boots
# 5 and 7 by simply adding a small wedge into the old welded joint....
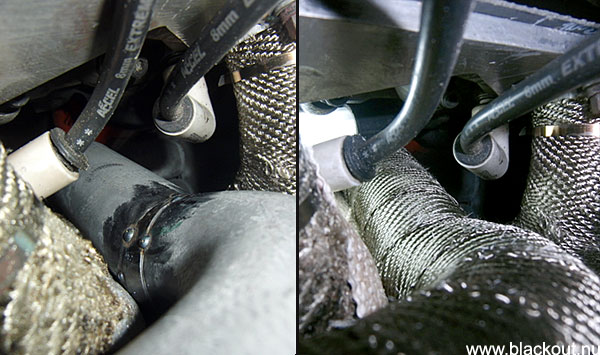
...see how good it came out!
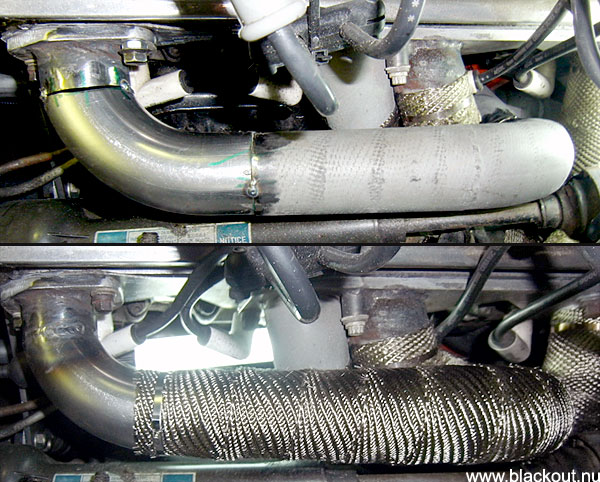
After replacing the twisted part of the tube it was done and once again could
be wrapped with Titanium
wrap material. Thanks Michael Hernwall for helping me come to start once more
in 2010!
More as it happens...but I REALLY hope that no more will happen!
